Sunday, March 2, 2025

Home Canning Custard the Amish Way

In today’s video, I am excited to share my take on making canned custard. This recipe comes from the book "Preserving God's Bounty," which has some fantastic tips on healthy cooking. I want to emphasize how important it is to have clear instructions, especially when using traditional recipes. Sometimes, details can be left out, and I learned that firsthand while preparing this dish.

One of the main aspects I discovered is how crucial it is to understand the cooking process involved in canning custard. After clarifying some details with the author, I found that a brief water bath is used, but refrigeration is needed to keep the custard fresh. I’m eager to guide you through gathering the right ingredients and preparing this delicious recipe with you.

Key Takeaways

  • Clear instructions are essential for successful canning.
  • Natural ingredients enhance the flavor and health benefits of custard.
  • Proper refrigeration is crucial for maintaining custard freshness.

Significance of Clear Directions

Clear instructions are essential when cooking, especially with recipes like canned custard. I often notice that some authentic Amish cookbooks assume readers know certain steps, which can lead to confusion. For instance, a recipe I encountered specified a processing time of just 2 minutes in a water bath. That raised a red flag for me since it seemed too short.

When I reached out to the author, she clarified that the processing was meant for achieving a specific texture, but the custard must be refrigerated afterward. This kind of vital information can easily be overlooked. It's crucial that recipes are complete and do not leave out important details, especially when sharing with a broader audience.

Always trust your instincts and do your research if something doesn't seem right. A brief call or message can provide the answers needed to ensure safety and quality in cooking. Clear instructions promote understanding and better results, making the cooking process smoother and more enjoyable.

See how to be self-sufficient on less than an acre of land!

Canned Custard Recipe Overview

Today, I'm going to share how to make canned custard using a recipe I found in the book Preserving God's Bounty. There's a bit of background on this recipe that I want to clarify. Authentic Amish cookbooks sometimes skip steps, assuming that the reader already knows what to do. This can lead to confusion, so I reached out to the author to make sure I had everything right.

To make this custard, you'll need:

  • 1 cup of milk
  • 1 cup of cream
  • 5 eggs
  • 1 teaspoon of vanilla
  • ½ cup of maple syrup
  • Cinnamon (to taste)

The cooking process involves a quick water bath for just two minutes. It’s important to know that this short processing time means the custard must be refrigerated right after. Without refrigeration, it won’t last long.

I use the cream from raw milk, as it gives a rich texture. If you can get raw milk, let it sit for a couple of days so the cream rises to the top. For those who use eggs in recipes, I find that having them at room temperature can make a difference in the final result.

When mixing, I like to add the milk and cream together, then whisk the eggs with vanilla and maple syrup. The goal is to warm the milk and cream to about 110°F before combining everything. This ensures a smooth mixture.

Using a non-reactive pan, I heat the milk and cream gently. Once warmed, carefully mix in the egg mixture. I prefer to strain the mixture to achieve a smooth custard texture.

This canned custard is a delicious treat, perfect for enjoying chilled for up to three to four weeks in the fridge. Enjoy making this simple yet tasty recipe!

Gathering Ingredients

I’m excited to share the ingredients needed for making canned custard. Here’s what you will need:

  • 1 cup of cream: If you have raw milk, let it sit for a couple of days to allow the cream to rise to the top. Use a turkey baster to collect it easily.

  • 1 cup of milk: Shake up your milk before measuring to ensure you get a good mix.

  • 5 large eggs: I prefer to use farm-fresh eggs at room temperature for better mixing. It helps improve the texture of the final product.

  • 1 teaspoon of vanilla extract: I recommend using homemade vanilla for the best flavor.

  • ½ cup of maple syrup: Switching to natural sweeteners like real maple syrup is a great choice.

  • Cinnamon: You can adjust the amount based on your taste. Add it during mixing or sprinkle it on top later.

When preparing your mixture, I like to use a non-reactive pan, such as stainless steel or glass. This helps maintain the flavor of the ingredients.

Separating Cream from Raw Milk

To get the cream from raw milk, start by letting the milk sit for a couple of days. This will allow the cream to rise to the top. I prefer using A2 A2 Jersey milk because it has a rich fatty cream that works perfectly for my recipes.

Once the cream has risen, I use a turkey baster to extract one cup of cream. This method is easy and effective. After that, I shake the remaining milk well, and measure out one cup of regular milk to use in my recipe.

Ingredients Needed

  • 1 cup of cream (top of the raw milk)
  • 1 cup of regular milk

I find raw milk is especially useful and versatile. It can be used to make various delicious items. Once I have my cream and milk, I set them aside while I prepare the other ingredients for my dish.

Preparing the Egg Mixture

To get started, I need to gather a few key ingredients. I am using five eggs, and I prefer them to be at room temperature. This helps with mixing and gives better results in my recipes. I am also grateful for the beautiful Farm Fresh rainbow eggs from my egg supplier.

Once I have the eggs ready, I will mix them well in a bowl. Next, I will add one teaspoon of homemade vanilla for flavor. The rich aroma of homemade vanilla is unbeatable. Then, I include half a cup of maple syrup. Recently, I've been focusing on replacing refined sugars, and 100% real maple syrup has become a favorite in my kitchen.

For a little extra flavor, I'm adding cinnamon. I like the flexibility of no specific measurement for this spice. I’m going to add a good amount directly into the mixture while stirring.

Now, I will warm my one cup of cream and one cup of milk together. It's important to use a non-reactive pot, like stainless steel or glass. I heat the mixture slowly to reach about 110°F. The milk and cream will warm up quickly, so I need to keep an eye on it.

Once the temperature is right, I’ll slowly mix in the egg mixture. It’s crucial to do this gently and take my time. I want everything combined smoothly without scrambling the eggs. This part really reminds me of making flan, a dessert I grew up enjoying. The blend of flavors in this custard is exciting.

Finally, I like to strain the mixture using a fine mesh strainer to ensure a smooth texture. This step is important for getting rid of any lumps and achieving that desirable custard consistency.

Natural Sweeteners in Recipes

I'm always looking for ways to use natural sweeteners in my cooking. One of my favorites is maple syrup. It's a great alternative to refined sugars, and I aim to replace processed sugars with more wholesome options.

Using maple syrup adds a rich flavor to recipes. I recently bought some 100% real maple syrup for around $20. It's definitely worth the investment. When I cook or bake, I often use about half a cup of maple syrup to sweeten my dishes. You can adjust this amount depending on your taste.

Another option I've enjoyed is honey. I’ve depended on it for sweetness in various recipes, but exploring new sweeteners like maple syrup keeps things exciting. You can use cinnamon alongside these natural sweeteners. I like to add cinnamon while mixing or sprinkle it on top for extra flavor.

When using these sweeteners, it's important to consider the overall balance in your recipes. They not only sweeten but can also enhance the texture and warmth of your dishes. So, whether I’m making a custard or another treat, I focus on using these natural ingredients to improve my health and enjoy the taste.

Health Updates at Home

Today, I'm excited to share how I make canned custard using a recipe from Preserving God's Bounty. If you want to try it, I have a discount code for 10% off, which is in the description.

I often find that some authentic Amish cookbooks leave out certain directions. This is because they assume everyone knows the standard process. I recently had a question about a recipe that didn't sit right with me, so I decided to reach out to the author for clarification. The recipe calls for one cup of milk, one cup of cream, and five eggs. The processing time is only two minutes in a water bath. I thought that seemed short, so I confirmed that this method is meant just for getting the custard texture. It's important to note that it must be refrigerated, as it won't last long outside, only about 3 to 4 weeks.

When it comes to the ingredients, I appreciate using raw milk. If you let raw milk sit for a few days, the cream will rise to the top. For this recipe, I use one cup of that cream, taking it with a turkey baster for ease. Then, I add one cup of regular milk. I find raw milk to be particularly rich and flavorful, making a big difference in my recipes.

Next, I gather five eggs. I prefer using farm-fresh eggs, ideally at room temperature, which helps with mixing and baking. After mixing the eggs, I add one teaspoon of homemade vanilla. The scent of homemade vanilla is wonderful. I also include half a cup of maple syrup to replace refined sugar in my recipes. Real maple syrup makes such a difference. I often use cinnamon as well, adding it to taste for flavor enhancement.

To prepare the custard, I want to warm my milk and cream mixture to about 110°F. I keep the heat low to avoid scorching. Once warmed, I slowly combine it with the whisked eggs, maple syrup, and cinnamon, mixing gently. I enjoy the creamy texture, reminiscent of flan, and often think about trying to make a flan version.

Finally, I prefer to strain the mixture before putting it into jars. This step helps to ensure a smooth custard. I use a strainer with my jars to make the process easier.

Preparing the Custard Mixture

To begin, I gather my ingredients. I need one cup of cream and one cup of milk. For the cream, I use the rich top layer from raw milk. If you have raw milk, let it sit for a couple of days to separate the cream. This gives a thick and tasty base. I love using A2 Jersey milk for its creamy quality.

Next, I measure out one cup of cream. A turkey baster works well for this task, making it easy to fill the measuring cup. After that, I shake the milk container to mix the cream back in and measure one cup of regular milk.

Now, I need five eggs. I prefer to use farm-fresh eggs and let them reach room temperature before mixing. They blend better this way. Once I have my five eggs, I mix them in a bowl.

I add one teaspoon of homemade vanilla for flavor and half a cup of maple syrup to naturally sweeten the mixture. The darker color from the maple syrup shows that it adds rich flavor. I also include cinnamon, adjusting the amount to my taste.

Next, I place my milk and cream mixture in a non-reactive pan. I heat it gently, aiming for about 110°F. As it warms up, I whisk together the eggs, cinnamon, and maple syrup. When the milk and cream reach the right temperature, I slowly mix my egg mixture into it. It’s important to do this slowly to avoid cooking the eggs.

After mixing, I prepare to strain the mixture. I use a strainer to ensure a smooth custard texture. With everything ready, I'm set to pour the mixture into jars for canning.

Cooking Method and Temperature

To make the custard, I start by gathering my ingredients. I need:

  • 1 cup of milk
  • 1 cup of cream (I prefer cream from raw milk)
  • 5 eggs
  • 1 teaspoon of vanilla
  • ½ cup of maple syrup
  • Cinnamon (amount to taste)

I first mix the milk and cream together in a large bowl. Then, I use five eggs, ensuring they are at room temperature for better mixing. I beat the eggs in another bowl before adding the vanilla and maple syrup.

Next, I slowly heat the milk and cream mixture on low until it reaches 110°F. It warms up quickly, so I pay close attention to avoid scorching it. While that heats, I whisk the egg mixture. Once the dairy is warm, I slowly combine it with the eggs, mixing gently.

For the final touch, I strain the mixture. This helps achieve a smooth custard texture. After the straining, I pack the custard into jars, process them in a water bath for 2 minutes, and let them cool for 1 hour. Proper cooling and refrigeration are crucial, as the custard will last about 3 to 4 weeks if kept in the fridge.

Mixing Ingredients and Cooking Suggestions

To make the canned custard, start with 1 cup of cream. If you have raw milk, let it sit for a few days so the cream rises to the top. This is the best cream to use because it’s rich and thick.

Next, add 1 cup of regular milk. I love using raw milk because of its quality. Mix this together in a bowl.

Then, in another bowl, crack 5 eggs. It’s best if the eggs are at room temperature, as this helps with mixing. To the eggs, add 1 teaspoon of vanilla and 1/2 cup of maple syrup. I’m switching to maple syrup to avoid refined sugars. Blend everything well. The mixture should have a lovely, darker color from the syrup.

You can add cinnamon according to your taste. There’s no need for an exact amount. You can mix it in or sprinkle it on top later; both ways work great.

For the next step, heat your milk and cream mixture. Use a non-reactive pan, like stainless steel or glass. Warm it gently until it reaches about 110°F. This should happen quickly, so keep an eye on it.

Once the mixture is warm, turn off the heat. Slowly whisk the egg, vanilla, syrup, and cinnamon mix into the warm dairy. Take your time with this step; it’s important to combine them gently.

I like to strain the mixture using a fine mesh strainer. This helps ensure a smooth texture. After straining, you can pour it into jars for canning. Remember to water bath process the jars for 2 minutes to achieve the right custard texture. After that, place them in the fridge where they can last for 3 to 4 weeks. Enjoy your delicious custard!

Preparing and Straining the Custard

To finish the custard, I begin by mixing one cup of cream and one cup of milk. I prefer using the cream that rises from raw milk, as it provides a rich flavor and texture. After combining these two ingredients, I set them aside.

Next, I take five eggs and bring them to room temperature. This step helps to blend the ingredients better. I whisk the eggs in a large bowl. Then, I add one teaspoon of vanilla and a half cup of maple syrup, mixing everything until well combined. I like to add cinnamon as well, adjusting the amount to my taste.

Now, it is time to combine the warm milk mixture with the egg mixture. I heat the milk and cream gently until it reaches about 110°F. Once it's warm enough, I gradually mix it with the eggs, whisking slowly to ensure a smooth custard without scrambling the eggs.

After combining everything, I prepare to strain the custard. I use a fine mesh strainer, which helps create a smooth texture. This step is essential for removing any lumps and ensuring that the custard has the right consistency. I pour the mixture through the strainer into a clean bowl or container, making sure to get every drop of that rich custard mixture.

Now, my custard is ready for canning or refrigerating. It's crucial to remember this custard needs to be stored in the refrigerator, where it can last about three to four weeks.

Custard Storage Tips

When it comes to storing custard, the first thing to know is that it must be refrigerated. After I've prepared it, I put it in the fridge right away. This helps keep it safe and tasty.

The custard will last about 3 to 4 weeks in the refrigerator. I always double-check the recipe when I'm unsure, as sometimes those details can be left out or taken for granted. For this recipe, the short water bath processing time of just 2 minutes is just to get the right texture.

Storage Guidelines:

  • Refrigerate immediately after preparation
  • Consume within 3 to 4 weeks
  • Do not store at room temperature; it can spoil quickly

Making custard is straightforward, but proper storage is key to enjoying it at its best.

See how to be self-sufficient on less than an acre of land!

Tuesday, February 25, 2025

12 Savory Chicken Wing Air Fryer Recipes That Deliver on Yumminess


If you’re a fan of crispy chicken wings that pack a punch of flavor, you’re in for a treat! These 12 savory air fryer recipes will take your wing game up a notch without the mess of deep frying. From classic buffalo to sweet and tangy glazes, we’ve got a variety of options to satisfy your cravings while keeping it easy and fun in the kitchen. So grab your air fryer and let’s get cooking!

Chipotle Lime Wings

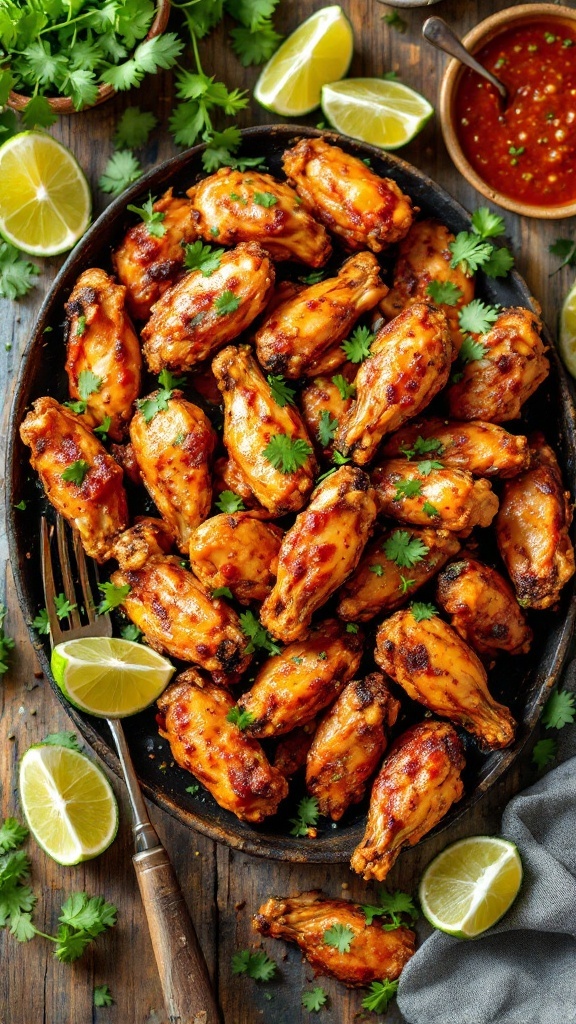
Plate of Chipotle Lime Wings garnished with cilantro and lime wedges.

Chipotle lime wings are a delightful combination of smoky and zesty flavors that will make your taste buds dance. This recipe is not only easy to follow, but it also delivers bold taste with minimal effort, perfect for a casual gathering or game day.

The tangy lime juice pairs beautifully with the warm spice of chipotle, creating a finger-licking experience. Air frying these wings gives them that crispy exterior while keeping the meat tender and juicy inside. Get ready to enjoy a flavorful bite!

Ingredients

  • 2 pounds chicken wings
  • 1/4 cup lime juice
  • 2 tablespoons chipotle sauce
  • 1 tablespoon olive oil
  • 1 teaspoon garlic powder
  • 1 teaspoon onion powder
  • 1 teaspoon smoked paprika
  • 1 teaspoon salt
  • 1/2 teaspoon black pepper
  • Fresh cilantro, chopped (for garnish)

Instructions

  1. Prepare the Marinade: In a large bowl, combine lime juice, chipotle sauce, olive oil, garlic powder, onion powder, smoked paprika, salt, and black pepper. Mix well to create the marinade.
  2. Marinate the Wings: Add the chicken wings to the bowl and toss to coat evenly. Cover and let them marinate in the refrigerator for at least 30 minutes, or up to 2 hours for deeper flavor.
  3. Preheat the Air Fryer: Preheat your air fryer to 400°F (200°C) for about 5 minutes.
  4. Air Fry the Wings: Arrange the marinated wings in a single layer in the air fryer basket. Cook for 20-25 minutes, flipping halfway through, until they are crispy and cooked through.
  5. Serve: Once cooked, remove the wings from the air fryer and garnish with chopped cilantro before serving. Enjoy with your favorite dipping sauce!

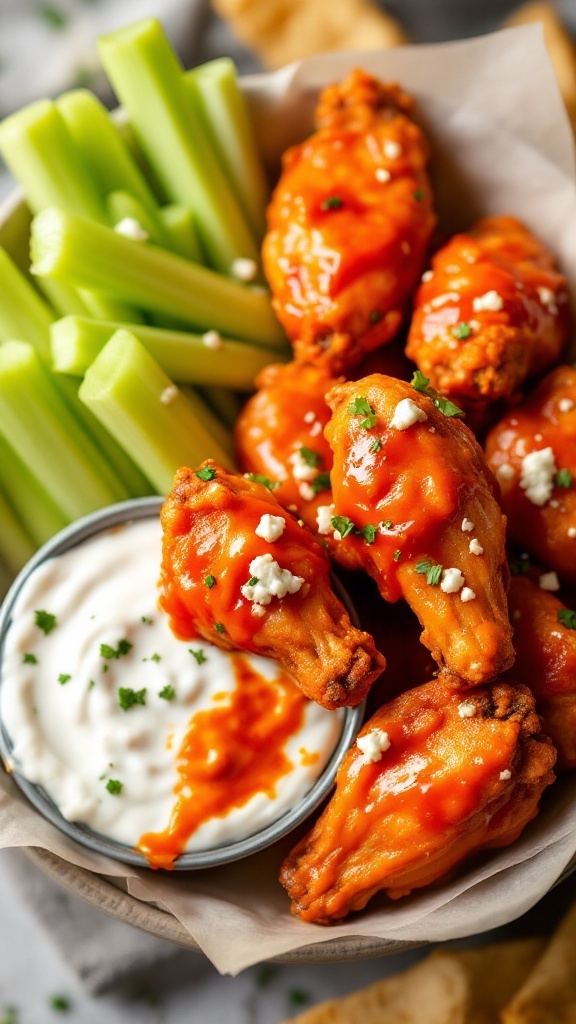
Spicy Buffalo Wings

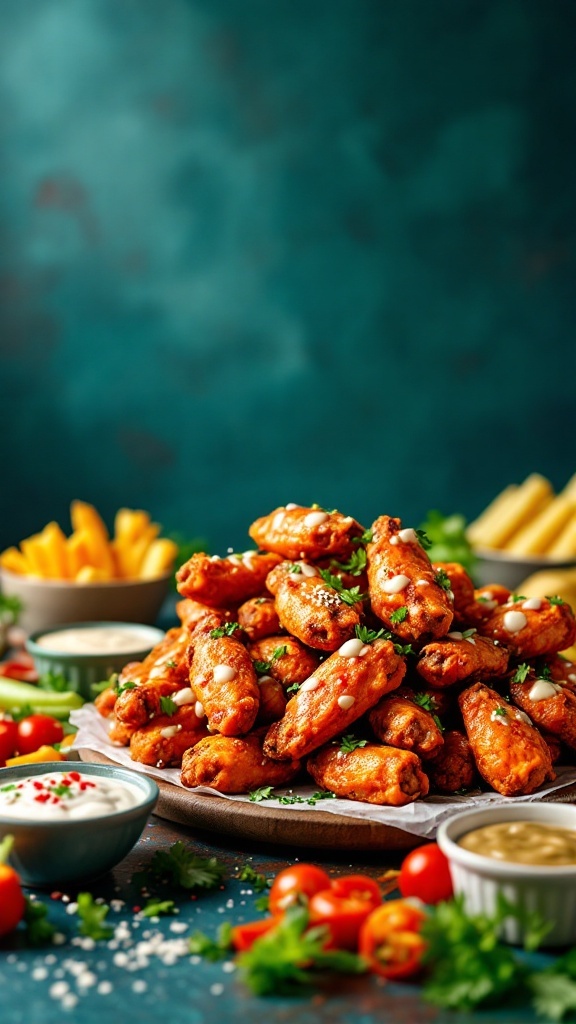
A plate of spicy buffalo wings with celery sticks and dipping sauce

Spicy Buffalo wings are a classic favorite that pack a flavorful punch. These wings are crispy on the outside, juicy on the inside, and coated in a tangy, hot sauce that brings just the right amount of heat. They're easy to make in an air fryer, making them a go-to for quick weeknight dinners or game day snacks.

With just a few ingredients, you can whip up a batch of these spicy wings in no time. Serve them with a side of creamy ranch or blue cheese dressing, alongside crunchy celery sticks for a delightful crunch. Get ready to dig in!

Ingredients

  • 2 pounds chicken wings
  • 1 tablespoon olive oil
  • 1 teaspoon garlic powder
  • 1 teaspoon onion powder
  • 1/2 teaspoon paprika
  • 1/2 teaspoon cayenne pepper (adjust to taste)
  • 1/2 teaspoon salt
  • 1/2 cup hot sauce (like Frank's RedHot)
  • 2 tablespoons unsalted butter, melted

Instructions

  1. Preheat your air fryer to 400°F (200°C).
  2. In a large bowl, combine the chicken wings, olive oil, garlic powder, onion powder, paprika, cayenne pepper, and salt. Toss until the wings are evenly coated.
  3. Arrange the wings in a single layer in the air fryer basket. Cook for 25-30 minutes, shaking the basket halfway through to ensure even cooking.
  4. While the wings are cooking, mix the hot sauce and melted butter in a small bowl.
  5. Once the wings are crispy and cooked through, remove them from the air fryer and toss them in the hot sauce mixture until well coated.
  6. Serve with ranch or blue cheese dressing and celery sticks on the side.

Amazon-affiliated link.

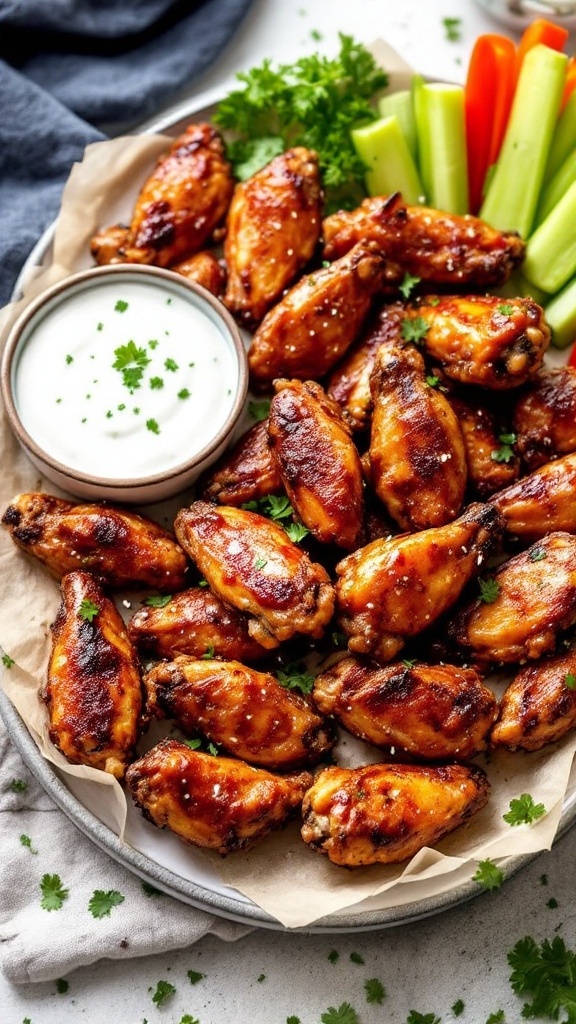
BBQ Ranch Chicken Wings

Plate of BBQ Ranch Chicken Wings served with ranch dipping sauce and fresh veggies

BBQ Ranch Chicken Wings are a delicious blend of flavors that brings a bit of tangy goodness to your meal. The combination of BBQ sauce and ranch seasoning creates a zesty, savory glaze that perfectly coats each crispy wing. These wings are not only tasty but also simple to prepare, making them a great choice for any gathering or a cozy night in.

Cooking them in an air fryer gives the wings a satisfying crunch without excessive oil. They come out beautifully crisp on the outside while remaining juicy on the inside. Serve them up with some fresh veggies and a side of ranch dressing for dipping, and you have a delightful dish that will please everyone!

Ingredients

  • 2 pounds chicken wings
  • 1/2 cup BBQ sauce
  • 1 packet ranch seasoning mix
  • 1 tablespoon olive oil
  • Salt and pepper to taste
  • Fresh parsley for garnish

Instructions

  1. Prep the Wings: Pat the chicken wings dry with paper towels and place them in a bowl. Drizzle with olive oil, then add the ranch seasoning and mix well until evenly coated.
  2. Air Fry: Preheat the air fryer to 380°F (190°C). Arrange the chicken wings in a single layer in the air fryer basket. Cook for about 25-30 minutes, flipping halfway through, until they are crispy and cooked through.
  3. Coat with BBQ Sauce: In the last 5 minutes of cooking, brush the wings with BBQ sauce to create a sticky, flavorful glaze.
  4. Serve: Once cooked, remove the wings from the air fryer and let them rest for a few minutes. Serve with extra BBQ sauce, ranch dressing, and fresh veggies for dipping.

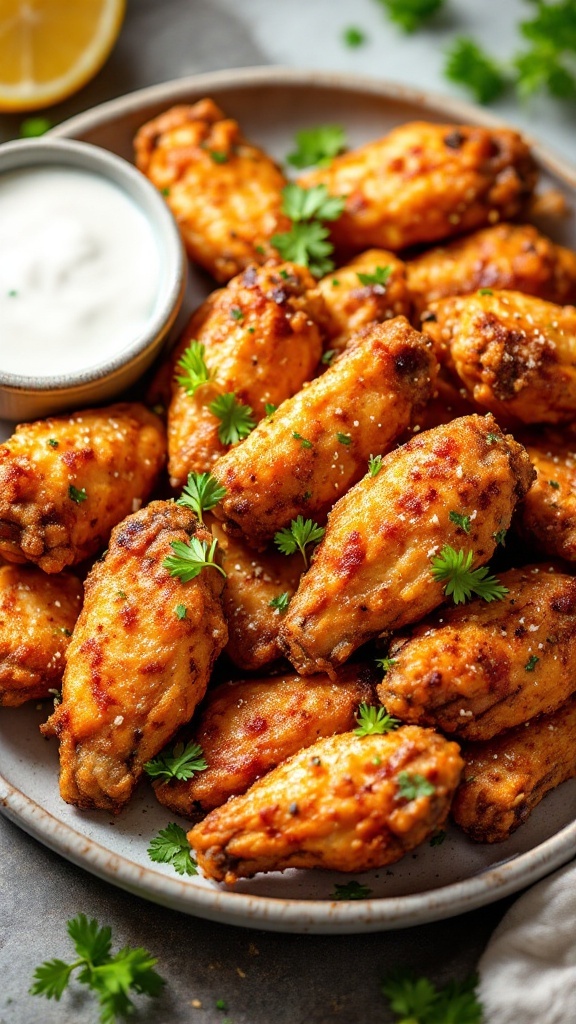
Crispy Garlic Parmesan Wings

A plate of crispy garlic parmesan chicken wings garnished with parsley

Crispy Garlic Parmesan Wings are a delightful twist on classic chicken wings, featuring a rich garlic flavor paired with the savory taste of parmesan cheese. The air fryer makes these wings super crispy without the need for deep frying, making them a healthier option for wing lovers. Simple to prepare, these wings are perfect for game day, parties, or a cozy night in.

With just a few ingredients, you can whip up a batch that will have everyone coming back for seconds. The combination of garlic, butter, and parmesan creates a mouthwatering coating that clings to each wing, ensuring every bite is packed with flavor. Plus, they’re easy to customize with your favorite herbs and spices.

Ingredients

  • 2 pounds chicken wings
  • 1 tablespoon olive oil
  • 1 teaspoon garlic powder
  • 1 teaspoon onion powder
  • 1/2 teaspoon salt
  • 1/2 teaspoon black pepper
  • 1/2 cup grated parmesan cheese
  • 2 tablespoons fresh parsley, chopped
  • 3 tablespoons butter, melted

Instructions

  1. Preheat your air fryer to 400°F (200°C).
  2. In a large bowl, combine chicken wings, olive oil, garlic powder, onion powder, salt, and black pepper. Toss until wings are well coated.
  3. Arrange wings in a single layer in the air fryer basket. Cook for 25-30 minutes, shaking the basket halfway through.
  4. While the wings are cooking, mix melted butter and parmesan cheese in a separate bowl.
  5. Once wings are crispy and golden, remove from the air fryer and immediately toss them in the butter and parmesan mixture.
  6. Garnish with fresh parsley before serving. Enjoy your deliciously crispy garlic parmesan wings!

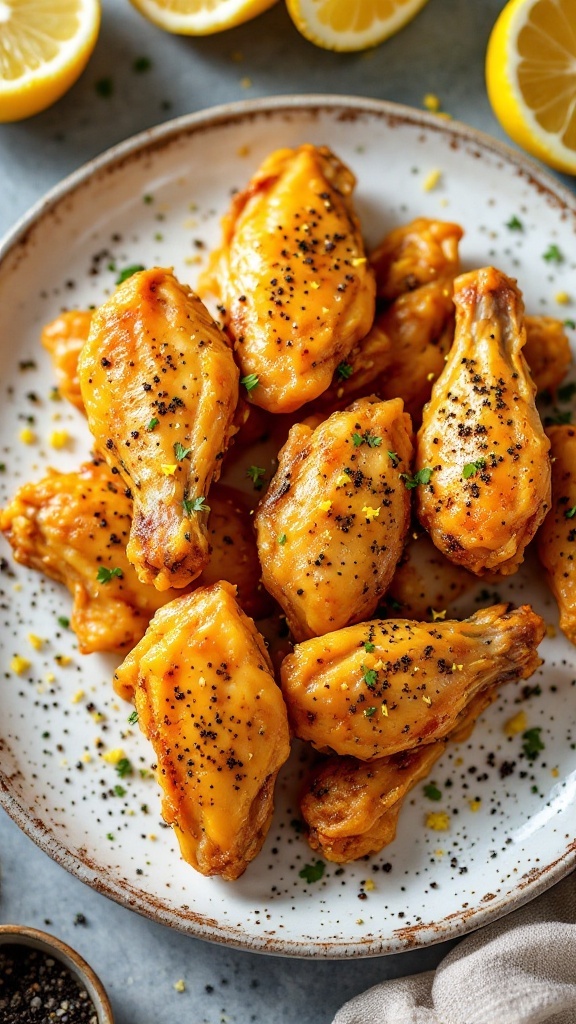
Lemon Pepper Wings

A plate of crispy lemon pepper chicken wings garnished with parsley.

Lemon pepper wings are a delightful twist on classic chicken wings, combining zesty lemon flavor with a hint of peppery spice. The bright citrus notes create a refreshing contrast with the savory chicken, making each bite a treat for your taste buds. Plus, making these wings in the air fryer is a breeze, resulting in a crispy exterior without the need for excess oil.

This recipe is not only simple to follow but also quick, making it perfect for game-day snacking or a casual weeknight dinner. With just a few ingredients, you can whip up a batch of lemon pepper wings that everyone will love!

Ingredients

  • 2 pounds chicken wings
  • 2 tablespoons olive oil
  • 1 tablespoon lemon zest
  • 2 tablespoons lemon juice
  • 1 teaspoon black pepper
  • 1 teaspoon garlic powder
  • 1 teaspoon salt
  • 1 teaspoon onion powder
  • Fresh parsley, chopped (for garnish)

Instructions

  1. Prepare the Wings: In a large bowl, combine chicken wings with olive oil, lemon zest, lemon juice, black pepper, garlic powder, salt, and onion powder. Toss until the wings are evenly coated.
  2. Preheat the Air Fryer: Preheat your air fryer to 400°F (200°C).
  3. Air Fry the Wings: Arrange the seasoned wings in a single layer in the air fryer basket. Cook for 25-30 minutes, flipping halfway through, until the wings are crispy and golden brown.
  4. Garnish and Serve: Once cooked, remove the wings from the air fryer and garnish with fresh parsley. Serve with your favorite dipping sauce, and enjoy!

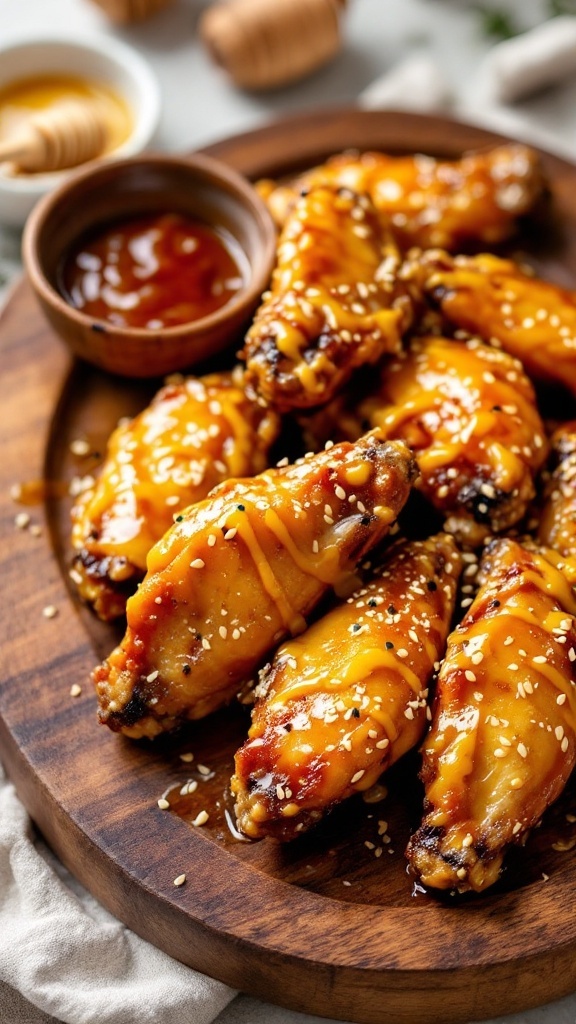
Honey Mustard Glazed Wings

Honey mustard glazed chicken wings served on a wooden plate with a side of dipping sauce.

If you're looking for a finger-licking chicken wing recipe that balances sweet and tangy flavors, honey mustard glazed wings are a fantastic choice. The honey adds a rich sweetness, while the mustard provides a zesty kick, making it a delightful experience in every bite.

This recipe is not only delicious but also super simple to whip up. Using an air fryer makes it easy to achieve that crispy texture without deep frying, so you can enjoy your wings without the extra grease. Perfect for game days or a casual dinner, these wings are sure to please everyone!

Ingredients

  • 2 pounds chicken wings
  • 1/4 cup honey
  • 1/4 cup Dijon mustard
  • 2 tablespoons olive oil
  • 1 teaspoon garlic powder
  • 1 teaspoon paprika
  • Salt and pepper to taste

Instructions

  1. Prepare the Wings: In a large bowl, combine the honey, Dijon mustard, olive oil, garlic powder, paprika, salt, and pepper. Add the chicken wings and toss until they're well coated.
  2. Preheat the Air Fryer: Preheat your air fryer to 375°F (190°C) for about 5 minutes.
  3. Cook the Wings: Place the wings in a single layer in the air fryer basket. You may need to cook them in batches. Cook for 25-30 minutes, flipping halfway through, until they are golden brown and crispy.
  4. Serve: Once cooked, remove the wings and toss them in any remaining glaze. Serve hot and enjoy!

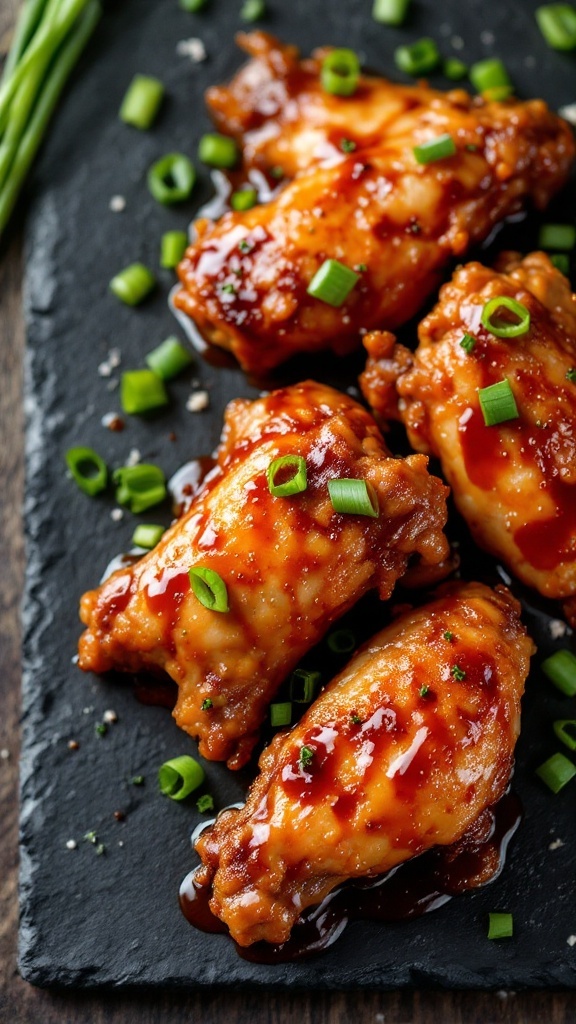
Teriyaki Chicken Wings

Delicious teriyaki chicken wings garnished with green onions and sesame seeds

Teriyaki chicken wings offer a delightful blend of sweet and savory flavors that are sure to impress. The sticky glaze, made from soy sauce and honey, caramelizes beautifully in the air fryer, giving the wings that irresistible shine and taste.

Plus, preparing these wings is straightforward, making them a go-to recipe for anyone wanting to elevate their chicken game without much fuss. Whether for a party or a cozy night in, teriyaki wings are a crowd-pleaser!

Ingredients

  • 2 pounds chicken wings
  • 1/2 cup soy sauce
  • 1/4 cup honey
  • 2 tablespoons rice vinegar
  • 1 tablespoon sesame oil
  • 2 cloves garlic, minced
  • 1 teaspoon ground ginger
  • Green onions, for garnish
  • Sesame seeds, for garnish

Instructions

  1. Prepare the Marinade: In a bowl, whisk together soy sauce, honey, rice vinegar, sesame oil, garlic, and ginger.
  2. Marinate the Wings: Place chicken wings in a large resealable bag and pour the marinade over them. Seal the bag and refrigerate for at least 30 minutes, or up to overnight for deeper flavor.
  3. Preheat the Air Fryer: Set your air fryer to 380°F (190°C) and let it preheat for about 5 minutes.
  4. Cook the Wings: Remove the wings from the marinade and arrange them in a single layer in the air fryer basket. Cook for 25-30 minutes, flipping halfway through until golden and cooked through.
  5. Glaze the Wings: In the last few minutes of cooking, brush the wings with the reserved marinade for added flavor and stickiness.
  6. Serve: Once cooked, garnish the wings with chopped green onions and sesame seeds before serving.

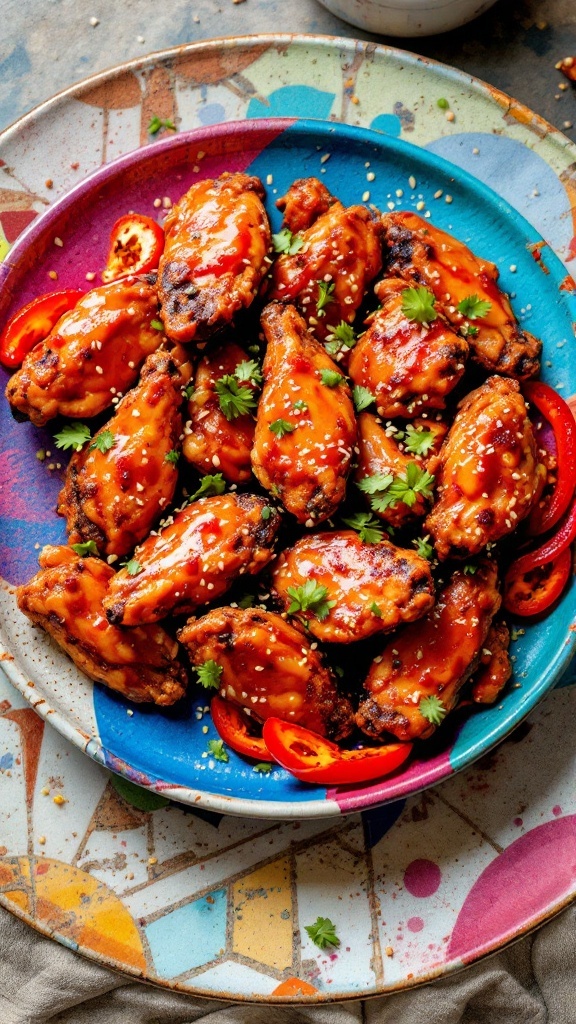
Sweet Chili Wings

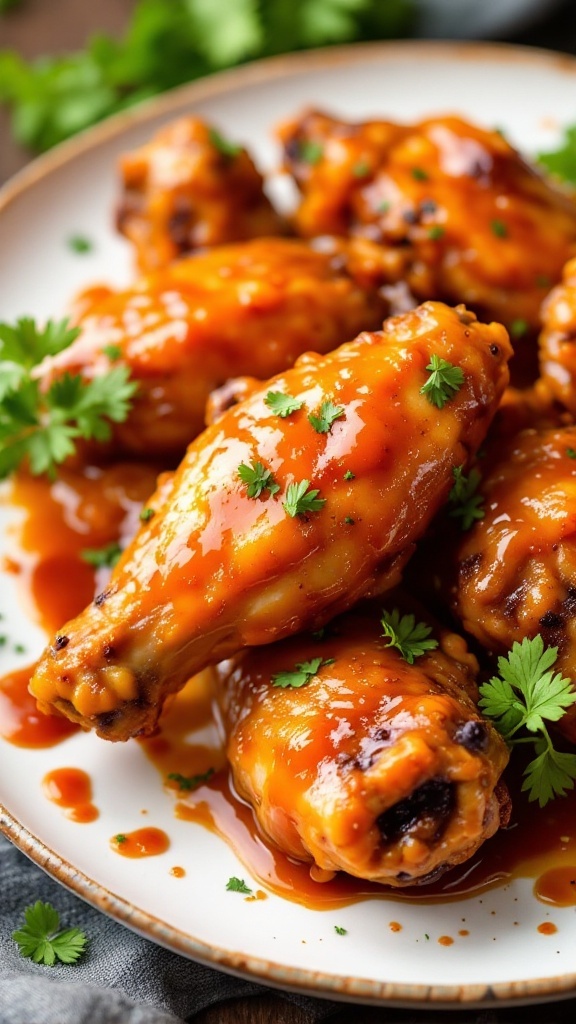
A plate of sweet chili chicken wings garnished with fresh herbs and sesame seeds.

Sweet chili wings are a delightful treat that combines the perfect balance of sweetness and heat. These wings are coated in a sticky, flavorful glaze that’s sure to please everyone at your table. Plus, making them in the air fryer keeps them crispy without the extra oil, making it a simple and healthier option!

The rich, tangy flavor of sweet chili sauce pairs beautifully with tender chicken wings, creating a dish that is both satisfying and fun. Whether it’s game day or just an ordinary weeknight, these wings are quick to prepare and will have everyone coming back for more!

Ingredients

  • 2 pounds chicken wings
  • 1/2 cup sweet chili sauce
  • 2 tablespoons soy sauce
  • 1 tablespoon honey
  • 1 tablespoon rice vinegar
  • 1 teaspoon garlic powder
  • 1 teaspoon ginger powder
  • 1/2 teaspoon black pepper
  • Sesame seeds and chopped green onions for garnish

Instructions

  1. Prepare the Wings: Pat the chicken wings dry with paper towels. This helps to ensure they get crispy in the air fryer.
  2. Make the Marinade: In a bowl, mix together sweet chili sauce, soy sauce, honey, rice vinegar, garlic powder, ginger powder, and black pepper.
  3. Marinate: Add the wings to the bowl and toss to coat them evenly with the sauce. Let them marinate for at least 30 minutes, or longer if you have time.
  4. Air Fry: Preheat your air fryer to 380°F (190°C). Place the wings in a single layer in the basket, and cook for about 25-30 minutes, shaking the basket halfway through.
  5. Garnish and Serve: Once the wings are crispy and cooked through, remove them from the air fryer. Drizzle with extra sweet chili sauce if desired, and garnish with sesame seeds and chopped green onions before serving.

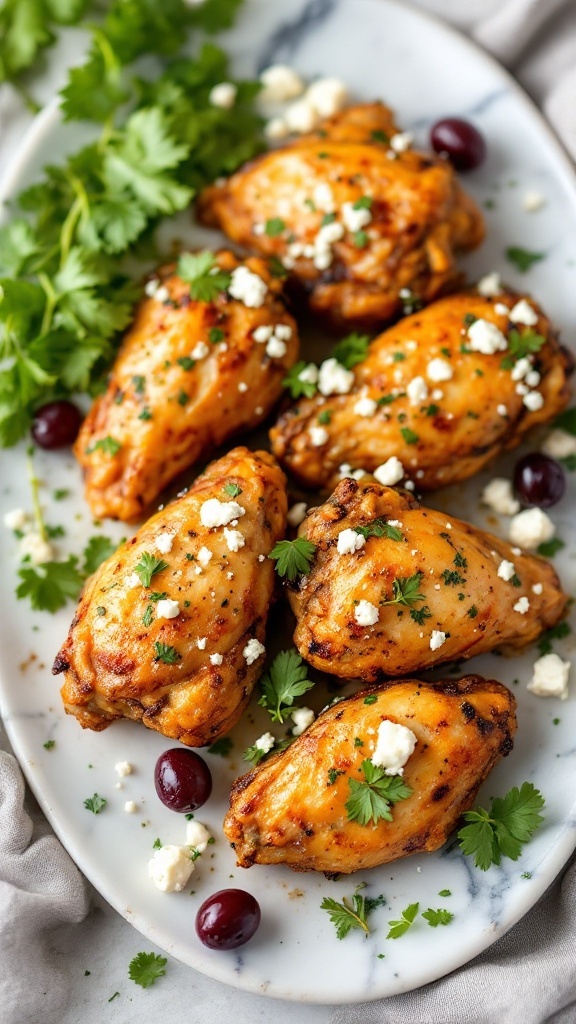
Mediterranean Herb Wings

Plate of Mediterranean Herb Wings garnished with parsley

If you're looking for a delightful twist on traditional chicken wings, Mediterranean Herb Wings are a fantastic choice. With their vibrant flavors and aromatic herbs, these wings offer a fresh taste that’s both satisfying and light. They are easy to make, perfect for gatherings or a cozy night in.

The blend of herbs like oregano, thyme, and garlic creates a savory profile that pairs beautifully with the crispy texture from the air fryer. Plus, they come together quickly, making them an ideal option for busy weeknights or impromptu get-togethers.

Ingredients

  • 2 pounds chicken wings
  • 2 tablespoons olive oil
  • 1 teaspoon dried oregano
  • 1 teaspoon dried thyme
  • 4 cloves garlic, minced
  • 1 lemon, juiced
  • Salt and pepper to taste
  • Fresh parsley, for garnish

Instructions

  1. Prep the Marinade: In a large bowl, mix olive oil, oregano, thyme, minced garlic, lemon juice, salt, and pepper.
  2. Add Chicken: Toss the chicken wings in the marinade until well coated. Allow them to marinate for at least 30 minutes, or up to 2 hours for deeper flavor.
  3. Preheat Air Fryer: Preheat your air fryer to 380°F (193°C) for about 5 minutes.
  4. Cook Wings: Place the marinated wings in a single layer in the air fryer basket. Cook for 25-30 minutes, flipping halfway through, until they are golden brown and crispy.
  5. Garnish and Serve: Remove wings from the air fryer, sprinkle with fresh parsley, and serve hot. Enjoy your Mediterranean feast!

Buffalo Ranch Wings

A platter of Buffalo Ranch Wings garnished with parsley and served with ranch dressing and vegetables.

Buffalo Ranch Wings are a tasty twist on the classic buffalo wing, combining the spicy zing of buffalo sauce with the creamy, herby flavor of ranch dressing. This recipe is quick and easy, making it a great choice for game days, gatherings, or any night you crave something delicious.

The air fryer brings a crispiness that rivals deep frying but with less oil, making these wings a healthier option without sacrificing taste. Serve them hot with extra ranch on the side for dipping, and watch them disappear!

Ingredients

  • 2 pounds chicken wings
  • 1/2 cup buffalo sauce
  • 1/2 cup ranch dressing
  • 1 tablespoon olive oil
  • 1 teaspoon garlic powder
  • 1 teaspoon onion powder
  • Salt and pepper to taste
  • Fresh parsley, chopped (for garnish)

Instructions

  1. Prepare the Wings: Rinse the chicken wings in cold water and pat them dry with paper towels. This helps them crisp up nicely in the air fryer.
  2. Season: In a large bowl, toss the wings with olive oil, garlic powder, onion powder, salt, and pepper until evenly coated.
  3. Air Fry: Preheat the air fryer to 400°F (200°C). Place the wings in the fryer basket in a single layer, making sure they’re not overcrowded. Cook for about 25-30 minutes, flipping halfway through, until they are golden brown and crispy.
  4. Coat in Sauce: In a clean bowl, toss the cooked wings with buffalo sauce until they are well coated.
  5. Serve: Drizzle ranch dressing over the wings or serve it on the side for dipping. Garnish with fresh parsley and enjoy!

Maple Chipotle Wings

Delicious maple chipotle chicken wings garnished with cilantro

Maple Chipotle Wings are a delightful blend of sweet and spicy, making them a favorite for any gathering. The maple syrup adds a touch of sweetness while the chipotle peppers bring a smoky heat that perfectly complements the crispy chicken wings. This recipe is super simple, requiring minimal ingredients and minimal effort, yet delivering big flavor with every bite.

These wings are not only easy to prepare in an air fryer, they cook up beautifully with a crispy exterior and juicy interior. Ideal for game day, parties, or a cozy night in, these wings are sure to please everyone at the table. Let’s dive into the ingredients and instructions to whip up this tasty dish!

Ingredients

  • 2 pounds chicken wings
  • 1/4 cup maple syrup
  • 2 tablespoons chipotle sauce
  • 2 tablespoons olive oil
  • 1 teaspoon garlic powder
  • 1 teaspoon onion powder
  • Salt and pepper to taste
  • Fresh cilantro for garnish

Instructions

  1. Prepare the Chicken: In a large bowl, combine the chicken wings with olive oil, garlic powder, onion powder, salt, and pepper. Toss to coat evenly.
  2. Mix the Sauce: In a separate bowl, whisk together the maple syrup and chipotle sauce until well combined.
  3. Coat the Wings: Pour the sauce over the chicken wings, ensuring they are evenly coated. Let them marinate for about 30 minutes for enhanced flavor.
  4. Air Fry the Wings: Preheat your air fryer to 400°F (200°C). Place the wings in a single layer in the air fryer basket. Cook for 25-30 minutes, flipping halfway through, until they are crispy and cooked through.
  5. Serve: Once cooked, remove the wings from the air fryer and garnish with fresh cilantro. Serve them warm and enjoy!

Cajun Spiced Wings

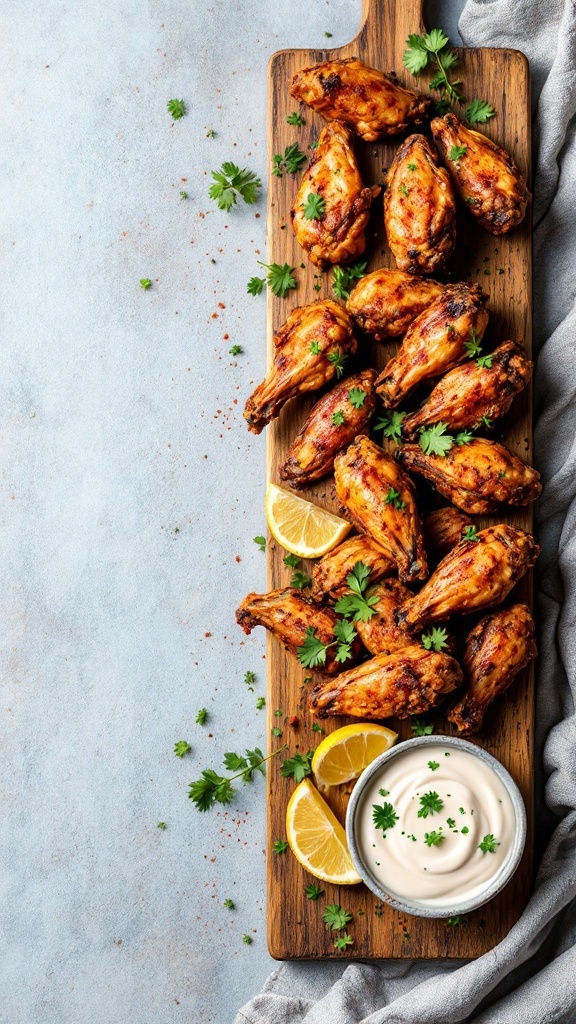
A beautifully arranged platter of Cajun spiced chicken wings garnished with parsley and lemon slices, served with a creamy dipping sauce.

If you’re looking to add a little zing to your chicken wings, Cajun spiced wings are a fantastic choice. This recipe brings the bold flavors of Cajun seasoning right to your air fryer, making it a quick and easy way to enjoy a delicious meal. The spicy, smoky notes perfectly complement the juicy chicken, creating a dish that’s both satisfying and full of flavor.

What’s great about making these wings in the air fryer is the crispiness you can achieve without deep frying. With just a few ingredients and simple steps, you’ll have a delightful platter of wings that’s perfect for game day or any gathering with friends. Serve with your favorite dipping sauce for an even more enjoyable experience!

Ingredients

  • 2 pounds chicken wings
  • 2 tablespoons olive oil
  • 2 teaspoons Cajun seasoning (adjust for spice preference)
  • 1 teaspoon garlic powder
  • 1 teaspoon onion powder
  • 1/2 teaspoon smoked paprika
  • Salt and pepper to taste
  • Fresh parsley for garnish
  • Your favorite dipping sauce (ranch or blue cheese)

Instructions

  1. Prepare the Wings: In a large bowl, toss the chicken wings with olive oil, Cajun seasoning, garlic powder, onion powder, smoked paprika, salt, and pepper until evenly coated.
  2. Preheat the Air Fryer: Preheat your air fryer to 380°F (190°C) for about 5 minutes.
  3. Cook the Wings: Place the seasoned wings in a single layer in the air fryer basket. Cook for 25-30 minutes, shaking the basket halfway through to ensure even cooking.
  4. Check for Crispiness: After cooking, if you desire extra crispiness, increase the temperature to 400°F (200°C) and cook for an additional 5 minutes.
  5. Serve: Once done, remove the wings from the air fryer and garnish with fresh parsley. Serve hot with your favorite dipping sauce.

Thursday, February 13, 2025

Homesteading Hack: Pressure Canning Nutrient-Dense Forbidden Rice (Full Tutorial)

Canning Forbidden Rice: A Homesteader’s Guide to Preserving the “Emperor’s Grain”

Imagine opening a jar of perfectly seasoned, ready-to-eat forbidden rice during a power outage or emergency—no water needed, no cooking required. In her latest YouTube tutorial, homesteader Mrs. H of Homestead Heart demonstrates how to preserve this ancient, nutrient-packed grain for long-term storage. 


Whether you’re prepping for disaster or simply building a self-sufficient pantry, this step-by-step guide to pressure canning forbidden rice (aka Lotus Rice) is a game-changer.

Pressure Canning Nutrient-Dense Forbidden Rice


Why Forbidden Rice?

Forbidden rice, once reserved for Chinese emperors, is an antioxidant-rich heirloom grain packed with iron, fiber, and protein. Its striking black hue and nutty flavor make it a versatile base for meals, while its sturdy texture holds up beautifully during pressure canning—unlike many rices that turn mushy.

Check out the latest and most popular pressure canners on Amazon HERE!
Amazon-affiliated link.

Key Benefits:

  • 🛡️ Water Conservation: Pre-cooked rice eliminates boiling water needs in emergencies
  • 🌶️ Custom Flavors: Season jars with garlic, Cajun spices, or curry
  • 📆 Long Shelf Life: Lasts 3-5+ years when stored properly

Step-by-Step Canning Guide

⚠️ Critical Safety Note: The USDA doesn’t endorse canning plain rice due to botulism risks. Always include acidic seasonings (garlic/pepper) and follow strict sterilization.

Process Overview:

  1. Prep Jars: Add ½ tsp salt + ¼ tsp white pepper per pint
  2. Fill Jars: Use a leveled ½ cup rice scoop (overfilling breaks seals)
  3. Pressure Can: 11 PSI for 15 minutes (altitude-adjusted)

Creative Seasoning Ideas

Flavor Profiles:

  • 🔥 Cajun Rice: ½ tsp Tony Chachere’s + ¼ tsp garlic powder
  • 🇮🇳 Curried Rice: Turmeric + cumin for pairing with meats
  • 🌿 Garlic Herb: Fresh cloves or granulated garlic + rosemary

Final Verdict

Mrs. H’s forbidden rice tutorial bridges homesteading tradition with modern preparedness. While not USDA-approved, her emphasis on seasoning and water conservation offers a practical blueprint for food sovereignty. As she says: “In disasters, water is for drinking—not cooking.”

Pressure Canning Nutrient-Dense Forbidden Rice


Labels: Canning, Food Preservation, Forbidden Rice, Homesteading, Emergency Prep, Ancient Grains, Pressure Canning, Shelf-Stable Meals, Off-Grid Cooking

Thursday, February 6, 2025

🍋🌿 Mediterranean Lemon Herb Chicken Recipe for Canning

🍋🌿 Mediterranean Lemon Herb Chicken - *Sun-Kissed* Pantry Staple 


🚫 Ditch bland, preservative-packed chicken forever! This **zesty lemon herb chicken** bursts with **fresh Mediterranean flavors**—think sun-drenched coastlines in every bite! 🌞✨ “The secret? Oregano-infused olive oil + a garlic-lemon punch that’s *chef’s kiss*!”

✅🌞 Why This Recipe is a Must-Try

  • Heart-healthy hero: Olive oil’s antioxidants + lemon’s vitamin C = **immunity-boosting magic**.
  • Budget-friendly: Costs 60% less than gourmet canned chicken (with 200% more flavor!).
  • Meal prep marvel: Toss into salads, grain bowls, or pitas—**ready in 3 minutes**.
  • #MediterraneanDiet trending: Tap into the viral clean-eating movement (hello, TikTok foodies!). 🥗📈

🍅 Ingredients (Makes 4 Pint Jars)

  • 3 lbs boneless chicken thighs (trimmed and cubed)
  • 1/2 cup extra virgin olive oil (+ more for jar layering)
  • 1/3 cup fresh lemon juice (+ zest of 2 lemons)
  • 6 garlic cloves, thinly sliced
  • 2 tbsp dried oregano
  • 1 tbsp dried thyme
  • 1 tsp sea salt
  • 1 tsp black pepper
  • Optional: 1/2 cup Kalamata olives or 1 tbsp capers for tang 🫒

👩🍳 Step-by-Step Instructions

  1. Sterilize jars: Boil 4 pint jars and lids for 10 minutes. Keep warm.
  2. Marinate magic: In a bowl, whisk olive oil, lemon juice/zest, garlic, oregano, thyme, salt, and pepper.
  3. Layer & pack: Divide chicken into jars, pour marinade over top, and add olives/capers if using. 💡Use a spoon to press chicken down—eliminate air pockets!
  4. Can it: Process in a pressure canner at 11 psi for 90 mins. 💡 No canner? Store marinated raw chicken in freezer bags for 3 months.

🗄️ Storage & Serving Brilliance

Store jars in a cool, dark pantry for 12-18 months. Once opened, refrigerate and use within 4 days. Ideas:

  • 🥙 Gyro night: Pair with tzatziki, tomatoes, and warm pita.
  • 🍚 Meal prep star: Mix with couscous, roasted veggies, and feta.
  • 🎁 Gourmet gift: Tie jars with twine and a sprig of dried oregano.

👯♀️ Tag your #CleanEating crew and save this for your next kitchen adventure! 📌🍋

Go Here for more unique chicken recipes for canning at home.

🔥🍋 Chipotle Lime Salsa Chicken Recipe for Canning

🔥🍋Chipotle Lime Salsa Chicken: The *Smoky-Sweet* Pantry Staple Going
 Viral!


🚫 No more bland, store-bought salsa chicken! This **fiery chipotle lime version** is **shelf-stable perfection**—packed with smoky heat, zesty brightness, and enough protein to fuel your busiest days. 🌶️✨ “The secret? Charred tomatoes + adobo sauce for that *chef’s kiss* depth!”

✅🌮 Why You’ll Be Obsessed

  • Metabolism booster: Chipotle’s capsaicin + lime’s vitamin C = **immune-support power duo**.
  • Budget genius: Costs 1/4 the price of pre-canned “gourmet” chicken!
  • 5-minute meals: Dump a jar into tacos, burrito bowls, or quesadillas—dinner’s done.
  • #TexMexTikTok approved: Ride the viral wave of smoky-sweet flavor combos. 📈🔥

🍅 Ingredients (Makes 5 Pint Jars)

  • 3 lbs boneless chicken breasts (cubed)
  • 2 cups fire-roasted tomatoes, crushed
  • 1 cup fresh lime juice (+ zest of 2 limes)
  • 4-5 chipotle peppers in adobo, minced (+ 2 tbsp sauce from the can)
  • 1 onion, diced
  • 4 garlic cloves, minced
  • 1 tbsp cumin
  • 1 tsp smoked paprika
  • 1 cup chicken broth (low-sodium)
  • Optional: 1/4 cup chopped cilantro or 1 tsp honey for balance 🌿🍯

👩🍳 Step-by-Step Instructions

  1. Sterilize jars: Boil 5 pint jars and lids for 10 mins. Keep warm.
  2. Sizzle the base: Sauté onion and garlic in 1 tbsp oil until golden. Add cumin/paprika; toast 1 min.
  3. Build flavor: Stir in tomatoes, lime juice/zest, chipotle peppers, broth, and chicken. Simmer 15 mins. 💡Chicken should be *just* cooked—it’ll soften in the canner!
  4. Can it: Ladle mixture into jars, leaving 1-inch headspace. Process in a pressure canner at 11 psi for 90 mins. 💡 No canner? Freeze in portions for 6 months!

🗄️ Storage & Serving Hacks

Store jars in a cool, dark pantry for 12-18 months. Once opened, refrigerate and use within 5 days. Ideas:

  • 🌯 Breakfast burritos: Scramble with eggs, cheese, and avocado.
  • 🥑 Instant nachos: Layer over chips with melted cheese and jalapeños.
  • 🎁 Hostess hack: Gift jars with a mini bag of tortilla chips and lime wedges.

👯 Tag your #SpicyFoodie bestie and save this for your next canning day! 📌🌶️

🧄🧀 Garlic Parmesan Chicken Marinade - *Restaurant-Quality* Flavor Hack You Can’t Afford to Miss!

🚫 Ditch those chemical-laden store jars! This **creamy, garlicky parmesan marinade** transforms basic chicken into a **shelf-stable gourmet meal**—with 5x the flavor and 10x the convenience. 🍗✨ “The secret? Fresh garlic + real Parmigiano-Reggiano (no dusty green cans here!).”


✅💫 Why This Recipe is Life-Changing

  • Immunity booster: Garlic’s antiviral properties + bone-strengthening calcium = **health in every bite**.
  • Cheaper than takeout: Whip up 6 jars for less than the cost of one Olive Garden trip!
  • Meal prep magic: Use it for pasta, salads, or sandwiches—**ready in 5 minutes** after a long day.
  • #GarlicLovers viral bait: Capitalize on the “garlic butter everything” TikTok craze. 🧄🔥

🧈 Ingredients (Makes 4 Pint Jars)

  • 3 lbs boneless chicken thighs (trimmed and halved)
  • 1 cup grated Parmesan cheese (freshly grated for best flavor!)
  • 1/2 cup olive oil
  • 8 garlic cloves, minced
  • 1/4 cup lemon juice (+ zest of 1 lemon)
  • 2 tbsp dried Italian herbs (oregano, basil, thyme)
  • 1 tsp black pepper
  • 1 tsp salt (adjust to taste)
  • Optional: 1/2 tsp red pepper flakes for heat 🌶️

👨🍳 Step-by-Step Instructions

  1. Prep jars: Sterilize 4 pint jars and lids in boiling water. Keep warm until ready.
  2. Mix marinade: In a bowl, whisk olive oil, lemon juice/zest, garlic, Parmesan, herbs, salt, and pepper.
  3. Layer chicken: Place chicken thighs in jars, then pour marinade over them. Use a chopstick to remove air bubbles. 💡Leave 1-inch headspace—marinade expands!
  4. Can it: Process jars in a pressure canner at 11 psi for 90 mins. 💡 No canner? Marinate chicken overnight and freeze for 3 months!

🗃️ Storage & Serving Genius

Store jars in a dark pantry for 12-18 months. Once opened, refrigerate and use within 4 days. Ideas:

  • 🍝 Instant Alfredo: Toss with fettuccine and a splash of cream.
  • 🥗 Salad superstar: Shred over greens with cherry tomatoes and croutons.
  • 🎁 Foodie gift: Pair with artisan bread and a “Just Add Pasta!” tag.

👯♂️ Tag your #GarlicObsessed friend and save this for your next pantry reset! 📌🧀

See how to be self-sufficient on less than an acre of land!
🌿🍋 Cilantro Lime Chicken with Black Beans - Zesty Canning Recipe


🚫 Skip the sad canned aisle slop! This **bright, bold cilantro lime chicken** with black beans is **shelf-stable magic**—jam-packed with protein, fiber, and enough zing to make your taste buds salsa. 💃🕺 “The secret? Fresh lime zest + a splash of tequila (optional, but *highly* encouraged).”

✅🌟 Why This Recipe is a Game-Changer

  • Detoxifying duo: Cilantro’s heavy metal-flushing powers + lime’s vitamin C = **immune-boosting gold**.
  • Budget hero: Costs 1/3 the price of store-bought “premium” canned beans & chicken!
  • Meal prep MVP: Dump a jar into tacos, salads, or nachos—dinner’s done in 5 mins flat.
  • #TexMexTrending: Capitalize on the viral Mexican-Latin fusion wave (thanks, TikTok!). 🌮📈

🥑 Ingredients (Makes 5 Pint Jars)

  • 3 lbs boneless chicken breasts (diced into 1-inch cubes)
  • 4 cups cooked black beans (or 2 cans, drained/rinsed)
  • 1 cup fresh cilantro, chopped + extra for garnish
  • 1/2 cup lime juice (about 4 limes + zest of 2)
  • 1 onion, finely diced
  • 3 garlic cloves, minced
  • 1 tbsp cumin
  • 1 tsp chili powder
  • 1 cup chicken broth (low-sodium for dietary flexibility!)
  • 2 tbsp olive oil
  • Optional: 1 jalapeño (sliced) or 2 tbsp tequila for depth 🔥

👩🍳 Step-by-Step Instructions

  1. Sterilize jars: Boil 5 pint jars and lids for 10 mins. Keep warm until filling.
  2. Sauté base: Heat olive oil in a pot. Cook onion and garlic until soft (3-4 mins). Add cumin/chili powder; toast 1 min.
  3. Build flavor: Stir in chicken cubes, beans, lime juice/zest, broth, and cilantro. Simmer 15 mins. 💡Don’t overcook chicken—it’ll soften more during canning!
  4. Can it: Ladle hot mixture into jars, leaving 1-inch headspace. Process in a pressure canner at 11 psi for 90 mins. 💡 No canner? Freeze in portioned bags for 6 months!

🗄️ Storage & Serving Hacks

Store jars in a cool, dark place for 12-18 months. Once opened, refrigerate and use within 4 days. Ideas:

  • 🥗 Instant fiesta bowl: Toss with quinoa, avocado, and pico de gallo.
  • 🌯 Breakfast burrito boost: Mix with scrambled eggs and cheese.
  • 🎁 Gift genius: Pair jars with a mini bottle of hot sauce and tortilla chips.

📸 Image Prompts to Go Viral

  • Sunlit jars showing vibrant green cilantro flecks against black beans and golden chicken.
  • A rustic table spread: open jar beside fresh guacamole, lime wedges, and charred tortillas.
  • Hands shaking a mason jar with ingredients mid-mix, herbs cascading dramatically.
  • Pantry before/after: dreary store-bought cans vs. colorful homemade jars labeled “Fiesta Fuel.”

🏷️ SEO Labels

cilantro lime chicken canning, canned chicken and beans, home canning recipes, pressure canning meals, Tex-Mex pantry staples, shelf-stable protein, healthy canned food, zero-waste meal prep, detoxifying recipes, Mexican fusion meals, DIY canned chicken, mason jar gifts, viral TikTok recipes, lime zest benefits, long-term food storage, budget-friendly canning, spicy chicken recipes

👯♀️ Tag your #TacoTuesday crew and save this for your next canning spree! 📌🌶️